Homemade Caramel Sauce
Okay, confession time. For years, I was a total skeptic when it came to making caramel sauce from scratch. I mean, it *looked* intimidating, right? All that bubbling sugar, the fear of burning, the sticky messes. I figured I’d just grab a jar from the grocery store and call it a day. But then, one chilly afternoon, inspiration struck. I was making a batch of brownies, and my usual store-bought caramel just wasn’t cutting it in my mind. I wanted something richer, something with a little more *oomph*. So, I dove in, slightly terrified, and you know what? It was a revelation. Pure, unadulterated, liquid gold. And guess what? It’s SO easy, you’ll wonder why you ever bothered with the pre-made stuff.
Why This Homemade Caramel Sauce is a Game-Changer
Honestly, this recipe is a lifesaver. It’s one of those foundational recipes that just elevates everything it touches. Think about it: drizzled over ice cream? Perfection. Swirled into your morning coffee? Heaven. Baked into cookies or cakes? Next level. The texture is just right, not too runny, not too stiff once it cools a bit, and the flavor is so much more nuanced than anything you’ll find in a plastic squeeze bottle. It’s got that perfect balance of sweet and slightly salty, with a deep, nutty caramel flavor that’s just incredibly satisfying. Plus, you know exactly what’s going into it – no weird artificial flavors or preservatives. It’s just good, honest ingredients doing their delicious thing.
What Does ‘The Best’ Homemade Caramel Sauce Actually Taste Like?
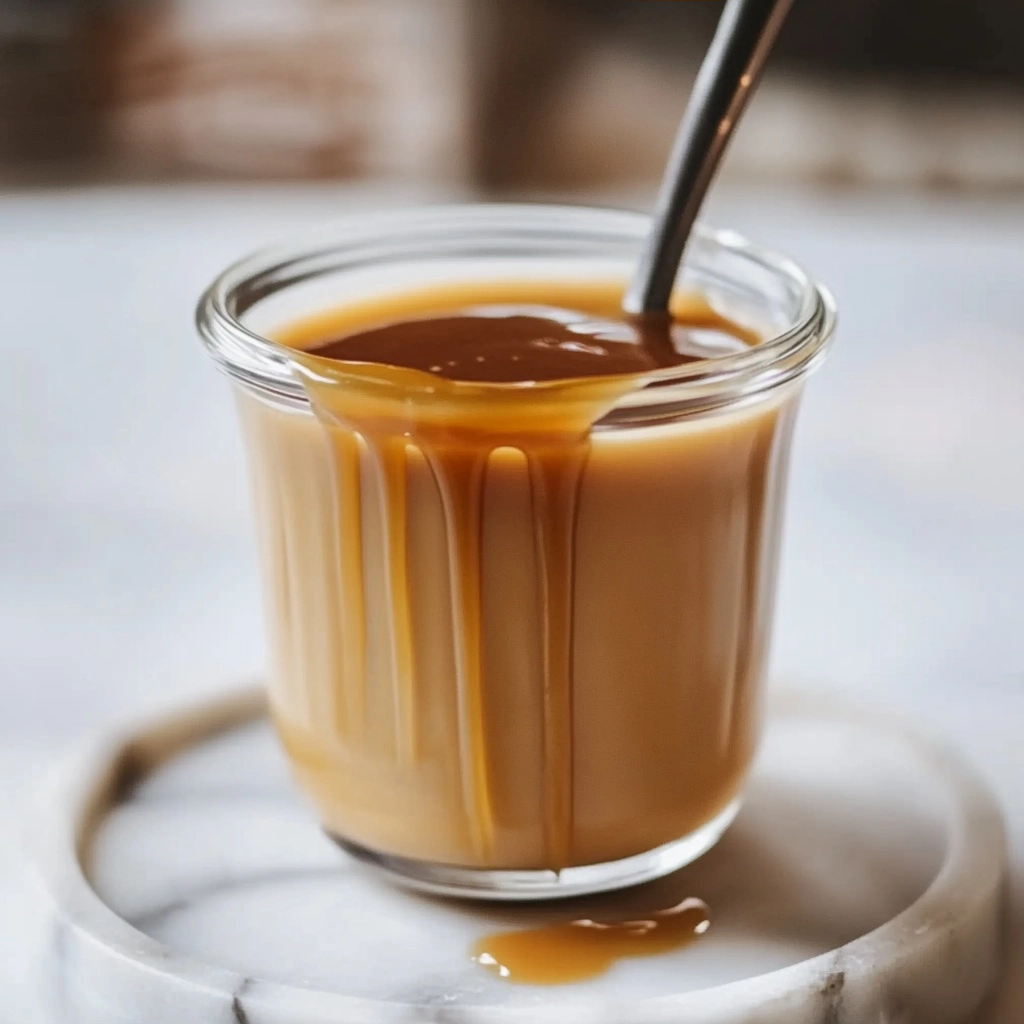
It’s rich, it’s creamy, and it has this beautiful deep amber color that just screams indulgence. The scent alone is enough to make your kitchen feel like the coziest place on earth. When it’s warm, it’s like a velvety river of pure joy, perfect for drowning your favorite vanilla ice cream. As it cools, it thickens up into a wonderfully chewy consistency that’s still pourable but has enough body to cling to your treats. It’s got a subtle richness from the butter and cream, a hint of complexity from the way the sugar caramelizes, and that touch of salt and vanilla just rounds it all out. It’s not just sweet; it’s *flavorful*. It’s the kind of caramel that makes you close your eyes and savor every single drop.
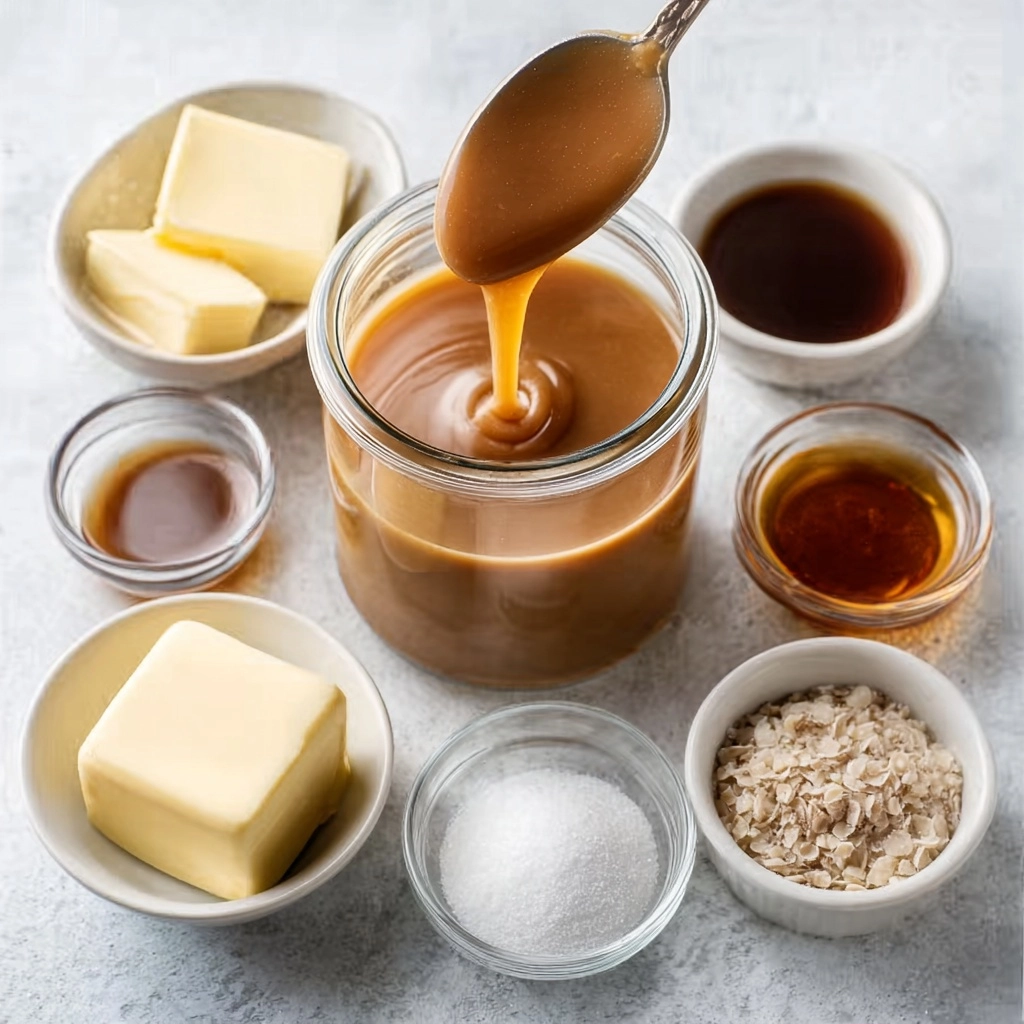
The Simple Ingredients You’ll Need
The beauty of this recipe is its simplicity. You probably have most of these things in your pantry already.
The Best Homemade Caramel Sauce: No More Store-Bought Sadness!
Ingredients
Method
- Combine granulated sugar and water in a heavy-bottomed saucepan
- Heat over medium to medium-high heat, avoiding stirring to prevent crystals
- Cook until mixture turns golden amber color
- Remove from heat, carefully stir in softened butter (mixture will bubble)
- Gradually add heavy cream while stirring
- Stir in salt and vanilla extract
- Cool slightly before use or storing
Notes
If sugar begins to darken too quickly, reduce heat and add a bit more water
For a nutty flavor, consider adding a pinch of cinnamon or toasted nuts
Store in an airtight container for up to 2 weeks in the refrigerator
- 1 cup granulated sugar: This is the base of our deliciousness.
- 1/4 cup water: Helps the sugar dissolve evenly without clumping.
- 6 tablespoons unsalted butter, cut into pieces: For that luxurious richness and smooth texture. Unsalted is key so you can control the saltiness.
- 1/2 cup heavy cream: This is what makes it luscious and creamy. Whole milk just won’t give you the same result, trust me.
- 1 teaspoon vanilla extract: Don’t skip this! It adds a wonderful depth of flavor and aroma. Good quality vanilla makes a difference.
- Pinch of salt: Just a little bit to balance out the sweetness and make all those caramel flavors pop. Seriously, don’t omit the salt; it’s a game-changer.
How to Make Homemade Caramel Sauce (It’s Easier Than You Think!)
Alright, let’s get to the good stuff. This process takes a little attention, but it’s not complicated. Just follow these steps, and you’ll be swimming in homemade caramel in no time.
- Combine Sugar and Water: Grab a 3-quart heavy-bottomed pot (this helps prevent scorching). Add your 1 cup granulated sugar and 1/4 cup water. Give it a gentle stir, just enough so the sugar is moistened and forms an even layer at the bottom. Try your best to keep it away from the sides of the pot; sugar crystals on the edges can cause the whole batch to crystallize later.
- Dissolve and Bubble: Place the pot over medium heat. Let it cook, and you’ll see the sugar start to dissolve, going from cloudy to clear. Once it’s clear and starts to bubble, step away from the stirring! Seriously, resist the urge. Just let it bubble away. Keep the heat at medium.
- The Color Change: This is where the magic happens. The liquid will start to change color. You might see some sugar trying to clump up on the sides – if that happens, you can use a spatula to *gently* brush those down occasionally. But the most important thing is to keep cooking WITHOUT stirring. Watch the color closely. You’re looking for a beautiful deep gold, like amber or honey. This can take anywhere from 8 to 15 minutes. Keep a VERY close eye on it. Burnt caramel tastes awful, like bitter charcoal. You want golden, not brown or black!
- Add Butter: Once you’ve reached that gorgeous deep gold color, carefully add your 6 tablespoons of unsalted butter, cut into pieces. Whisk constantly. Be warned: this will bubble up DRAMATICALLY! It might seem like it’s going to overflow, but just keep whisking until the butter is completely melted and incorporated.
- Incorporate Cream: Take the pot off the heat. Now, *slowly* pour in your 1/2 cup of heavy cream while whisking continuously. Again, it will bubble up, but keep whisking until it’s all smooth and combined. This is where it transforms into that luscious caramel sauce.
- Flavor Boost: Whisk in the 1 teaspoon of vanilla extract and the pinch of salt. Give it a good stir to make sure everything is perfectly mixed.
- Cool Down: Let the caramel sauce sit in the pot for about 10 minutes to cool down slightly. It will still be quite hot and liquidy.
- Jar and Chill: Pour the slightly cooled caramel into a lidded glass jar. Allow it to cool completely at room temperature first. The caramel will be runny when it’s hot, but don’t panic! As it cools, it will thicken up beautifully into a gorgeous, chewy texture. Once it has cooled completely, since it contains dairy, you’ll need to store it in the refrigerator.
My Little Secrets for Caramel Success
Over the years (and yes, I’ve made this *a lot*), I’ve picked up a few little tricks. First off, that heavy-bottomed pot is non-negotiable. It really does make a difference in even heating. Second, don’t be afraid of the swirling sugar thing. A gentle brush down the sides with a heat-proof spatula as needed is totally fine. If your caramel does start to crystallize a bit, don’t throw it out! Sometimes a lower heat and more gentle stirring can help it come back. Also, I actually tested this recipe twice because the first time I made it, I added the cream while the sugar was still *too* hot, and it seized up a bit. Letting it cool for just those 10 minutes makes a world of difference in getting that smooth, luscious texture.
Easy Variations to Try
Once you’ve mastered the classic, the sky’s the limit! You can whip up a batch of salted caramel by just adding a larger pinch of flaky sea salt at the end. Feeling fancy? Try infusing the cream with a cinnamon stick or a few cardamom pods (strain the cream before adding it to the caramel). A little bit of espresso powder whisked in can turn it into a mocha caramel, which is divine over chocolate cake. You could even add a splash of your favorite coffee extract for an extra kick!
Frequently Asked Questions About Homemade Caramel
Q: My caramel crystallized. What did I do wrong?
A: This usually happens if sugar crystals form on the sides of the pot and then fall into the caramel. Make sure to brush down the sides gently if you see crystals forming. It can also happen if you stir the sugar too much before it dissolves. If it does crystallize, sometimes you can try gently heating it with a little more water and stirring to re-dissolve, but it’s not always salvageable. Start over with clean equipment and a lighter touch!
Q: How long does homemade caramel sauce last?
A: Stored in an airtight container in the refrigerator, it should last for about 2-3 weeks. The texture might change slightly over time.
Q: My caramel is too thick/too thin. How do I fix it?
A: If it’s too thick after cooling, you can gently reheat it in a saucepan or microwave and whisk in a tablespoon or two of warm cream or milk until it reaches your desired consistency. If it’s too thin, unfortunately, it’s harder to fix. You might need to gently simmer it for a few more minutes, but be very careful not to burn it. Next time, make sure you let it thicken fully as it cools.
Q: Can I make this with different types of sugar?
A: While granulated sugar works best for its reliable caramelization, some people have success with light brown sugar for a slightly different flavor profile. Dark brown sugar can make it too molasses-y when caramelized. I’d stick with granulated for this “best ever” recipe.
Final Thoughts on Homemade Goodness
Seriously, don’t let the fear of making caramel from scratch hold you back. This recipe is simple, rewarding, and the end result is so ridiculously delicious. It’s like a warm hug in a jar. Whether you’re a seasoned baker or just starting out, give this a try. Your coffee, your desserts, and your taste buds will thank you. Happy cooking (and drizzling)!